
Guild Missions Guide: Puzzle
2 posters
Blackgate :: Guild Wars 2 :: Activities
Page 1 of 1

Guild Missions Guide: Puzzle
![]() by Dragnix Pheodron Tue Jul 14, 2015 9:13 am
by Dragnix Pheodron Tue Jul 14, 2015 9:13 am
Guild puzzle is the third set of GMs, there are 3 different options for this, they all require strict coordination from all members, there are jumping parts in these activities so please keep that in mind.
[You must be registered and logged in to see this link.]
Angvar’s Trove – Snowden Drifts
[You must be registered and logged in to see this image.]
Part 1 – Jumping
Part 1 – Jumping
This starts off with a jumping section straight away, there are several narrow planks that you need to jump on to, if you do fall, do not worry... look for a tag to identify where portals will be dropped to catch back up.
Part 2 – Get across the chasm
The GM leader will break the parties into two groups, one group will stay up the top using the bows to shoot the icicles down, and the other group will go down the bottom to coordinate with each other to place the icicles in the steam vents to make the five TEMPORARY step platforms, once enough people make it across all 5 platforms they can open the door and the people down the bottom are able to run on through to the next section.
Group up top shooting:
Most icicles hanging from the roof will fall with only one attack, there is one big icicle however that will take several attacks to fall, this large icicle is the primary platform which lasts about a minute, so you need to ensure that the first platforms are almost in place before beginning attacks on the largest icicle.
When you make it to the big primary icicle, continue shooting down the other icicles so the bottom group are able to continue plugging up the vents!
Once you get across to the other side please light three torches at the same time to open the door to the next area of the puzzle.
Group down below:
It is your job to plug the vents with icicles causing a rock platform to rise above the steam vent for a few seconds while all holes are plugged to allow the group up top to make their way across to the other side.
There are four steam vents at the bottom of each platform; you will need to ensure that you have the two smaller platforms ready to go before the top group are able to shoot down the biggest icicle platform as there is a very short and limited time that these platforms are able to be used.
There is a gate off to the side to go through to the next area once the torches have been lit up top.
Part 3 – Jumping onto a ship
Navigating your way over more jumps and planks you will need to reach the bottom of an abandoned ship, once you have made it to the deck of the ship, look to your right for a narrow cave opening which is guarded by imps, follow the passage which will take you into the next part of the puzzle.
Unfortunately if you fall during this part you will most likely die, so those who make it to the bottom, the first thing you need to do is ensure everyone is revived and directed where to go! Please do not WP if you die, just wait for someone to revive you!
Part 4 – Navigating through the sealed gateway
Before leaving the passage of the cave please WAIT until instructed to move out, as it is timed and it is important that everyone makes it through together.
At the signal of the GM Leader you need to run up and grab a powder keg and run to the far left passage, following it along until you reach a wall of ice, it should only take 1 keg to break them... however as you move along breaking down walls.. The final wall will need at least 3 kegs to destroy it.
Each keg has a timer and they will self-detonate once the timer has ended, this means you need to work fast as a group and ensure you don’t lose any kegs along the way.
To avoid getting left behind stay with the group and speak up immediately if you do fall behind (mesmers can help with this!!!!)
Part 5 - More Jumping!
At the end of the jumps you want to take a big jump off the end of a platform into a pool of water and swim along until you see a rock coming up out of the water, jump up and follow it along (with the group) until you reach the next part of the puzzle.
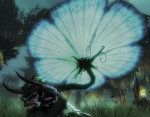
Part 6 – Light the Totems
There will be three shrines on both sides of the room, and six totems at the far end. Inside this room is a Legendary Drake Guardian that breathes fire.
One person needs to pick up cooled eggs and lure the Drake to each of the shrines so that they may be lit with the fire breath.
Once a shrine has been lit by the Drake’s breath a single player must light a torch with the fire and go to the matching animal totem at the end of the room, waiting to ensure that a player is at ALL totems before lighting them ALL at once.
[You must be registered and logged in to see this image.]
Part 1 – Opening the door
The GM Leader will press a button in the middle of the room to activate this step.
You will need to go to junk piles scattered around the room and find six batteries (charges) to deposit in the centre, each junk pile will have a lot of extra random stuff that you can just drop, or throw aside to distract the skritt. You’re primarily looking for a ball of sparkling lightening that you will put into the battery that is in the middle of the room.
While holding the charge you will be attacked by skritt guarding the junk piles, if you get hit, you will drop the charge and you will need to go find it again in the junk pile. You cannot dodge while holding the charge and your run speed is decreased dramatically.
Part 2 – Jumping
Simple jumping puzzle that can turn very difficult with many people, take your time and work your way across the jumps to the other side, if you fall from the highest point you will most likely die, so can we please ensure we have people who are willing to stay back and revive others, a Mesmer will always be available for porting.
Part 3 – Elevator matching
The GMs Leader will press a button on the wall inside to start this next phase once everyone is inside.
All around the room are holes with an animal icon above them, you need to check the icons shownin the centre of the room, For example: Image of a pig, go up to the image and interact with it to transform yourself into a pig, then looking around for the image of a pig on the outer walls walk into the hole and interact with it, if done correctly a blue bar will appear.
All six animal ‘cubby holes’ within 45 seconds to successfully complete the process. This needs to be done three times to reach the top floor!
Part 4 – Timed Jumping
You will have about 20 seconds to make it across the platforms before they disappear, do not worry if you fall, portals are always close by for those that need it, please don’t worry!
At the end of the jumping there are four stone pillars with a button on them, it is important that a person stands on each of these to hold the door to the next room open, once ensuring EVERYONE is through, the people on the buttons also jump into the next room.
Part 5 – Mice in a maze
[You must be registered and logged in to see this image.]
Before activating the maze, you need to take a path off to the left which will bring you to a vantage point that shows the entire maze.
There are four pylons on top of the maze that are always in the same spot which will mark the locations of staircases inside the maze which will show where each orb is hidden.
There are six orbs in total that need to be found and carried to the end.
Upon activating the maze up at the vantage point, light beams will pop out in the maze; these are the orbs which are located randomly each time.
Take note of the rough location of each orb and head on in! There are traps that can be disabled by going up the staircases to the pylons.
Certain walls are able to be destroyed, it is quite common that orbs will be hidden behind. Once you have an orb carry it to the end of the maze and deposit into one of the six tanks.
There will be skritt mobs, sentry golems and a legendary NPC that you will need to avoid.
Go get your cheese!
Langmar Estate – Plains of Ashford
[You must be registered and logged in to see this image.]
Part 1 – Open the door and escape the courtyard
To activate this puzzle the GM Leader will interact with a book in the middle of the room, it will tell you the rock, paper, scissors combination.
The goal is to let the Charr statues win by giving them weapons that will allow them to beat their human statue counterpart across from them.
To give them weapons you need to look at 3 weapon racks on the sides of the room totalling 12 racks.
Each weapon rack will either contain a weapon or a Ascalonian mob, if a ghost is spawned move on to the next rack.
Once all Charr statues have weapons, the door will open.
Part 2 – open the locked gate
There are four buttons scattered around the room that involves a bit of jumping, there needs to be a player at each of these buttons to open the next area.
Part 3 – Curtains
When entering the room it is CRUCIAL that anyone who stands at a curtain is on TS as we have a four second window upon which all curtain’s emotes need to be activated.
There are six curtains down below; and another six up above on platforms, pressing F (often needs to be pressed twice) will open the curtain to show a man showing different emotes, these could be: /dance, /sit, /point, /salute, /bow, /wave.
The six people standing at the first level of curtains need to wait for the GM Leader to count down (3, 2, 1 go) to open up the curtain and perform the emote shown, if every curtain’s emote has been performed accurately the six curtains up above will be available to perform their emotes which need to match the ones down the bottom. There is a slight ‘cheat’ that can help by the people at the curtains up top ‘spam’ emotes at each curtain to ensure all emotes are covered.
Part 4 – open the door and escape the armory
There are three levels that need to be navigated to access the next room. The top level has two buttons that players need to stand on while having a couple other players defending them from ghosts that will spawn and attack the people on the buttons.
By standing on the buttons it releases a flow of water to the next level dispersing the poisonous gas temporarily allowing for people to move down to the next floor.
The second floor will have oozes that need to be killed, they will drop a ball of ooze that you need to grease the rusty gears in the centre to make them turn, this will keep the poisonous gas out while the wheels are turning, ensure you leave the people on the buttons and people defending them as well as people continuing to grease the gears.
The third and bottom floor are broken carts guarded by ghosts, you need to gather materials such as: wood plank, metal rod, rope and bring them over to the locked door to the north.
The materials gathered will create a makeshift ram, launching the ram into the door will make it burst open revealing the final chest ahead, don’t forget to keep following the group as there is a second chest underwater in a well.
Last edited by Dragnix Pheodron on Wed Jul 22, 2015 3:03 am; edited 1 time in total

Dragnix Pheodron- Level 50
-

Guild : Army of Lightness (AoL)
Number of posts : 522
City : Melbourne, Australia
Occupation : Student
Registration date : 2014-06-08
The Beau Brothers- Divine Light
-

Guild : AOL
Number of posts : 2949
City : Morgan City, LA
Occupation : Student, Math Tutor
Hobbies : Gaming, Cooking, Bowling, Entertaining Friends
Registration date : 2007-09-19
» Guild Missions Guide: Set Up
» Guild Missions Location Guide
» Guild Missions Guide: Bounty
» Guild Missions Guide: Challenge
» Guild Missions Guide: Rush
» Guild Missions Location Guide
» Guild Missions Guide: Bounty
» Guild Missions Guide: Challenge
» Guild Missions Guide: Rush
Blackgate :: Guild Wars 2 :: Activities
Page 1 of 1
Permissions in this forum:
You cannot reply to topics in this forum|
|
|